See how FixAhead runs maintenance, step by step
FixAhead automates preventive maintenance, tracks every asset, and keeps your team accountable — replacing spreadsheets with real-time control.
Map your facility
Model your facility as deeply as you need — building, floor, room, zone — and place every asset in its location.
Learn more about Asset Management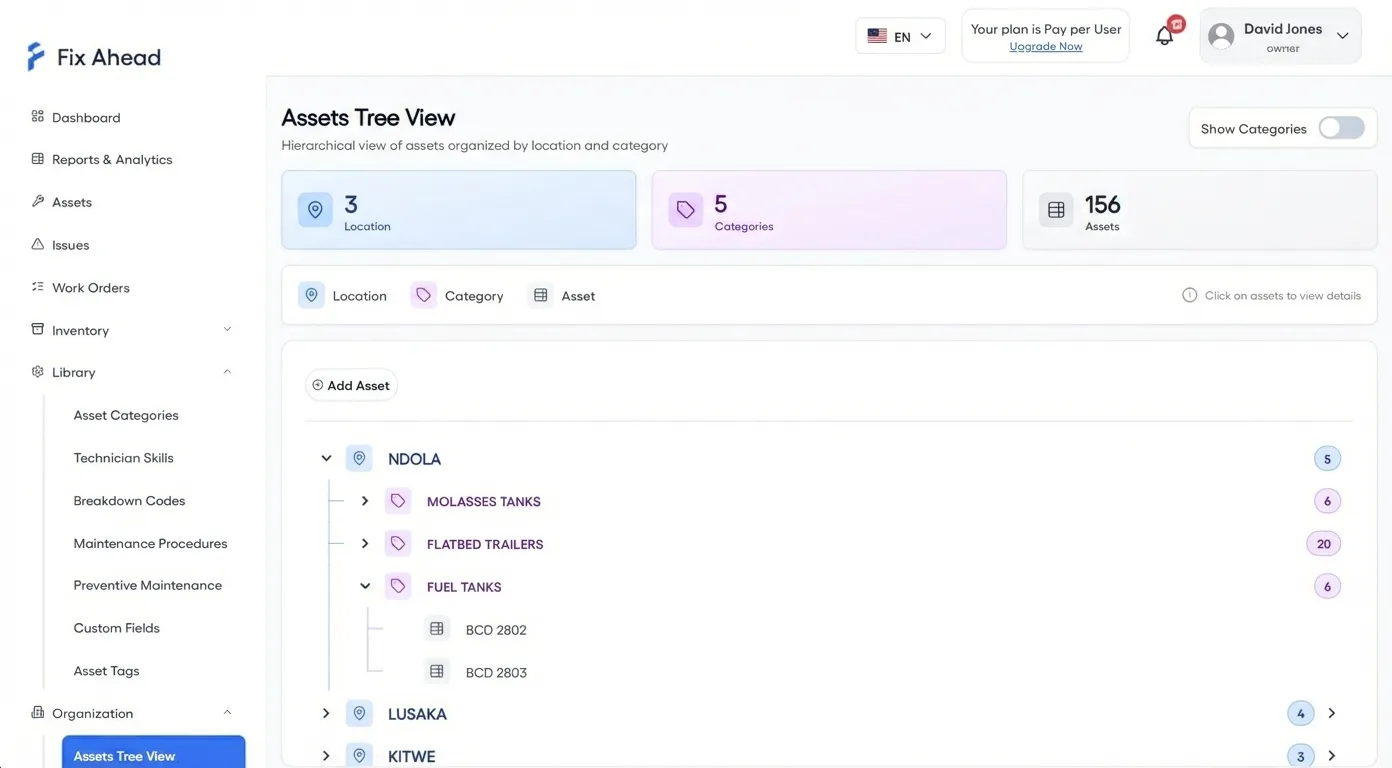
Give every asset a QR code
Generate a QR code for every asset and attach its documents (Pro), manuals, and certificates to its profile. Download saves the label as a PNG, which you can print.
Learn more about Asset Management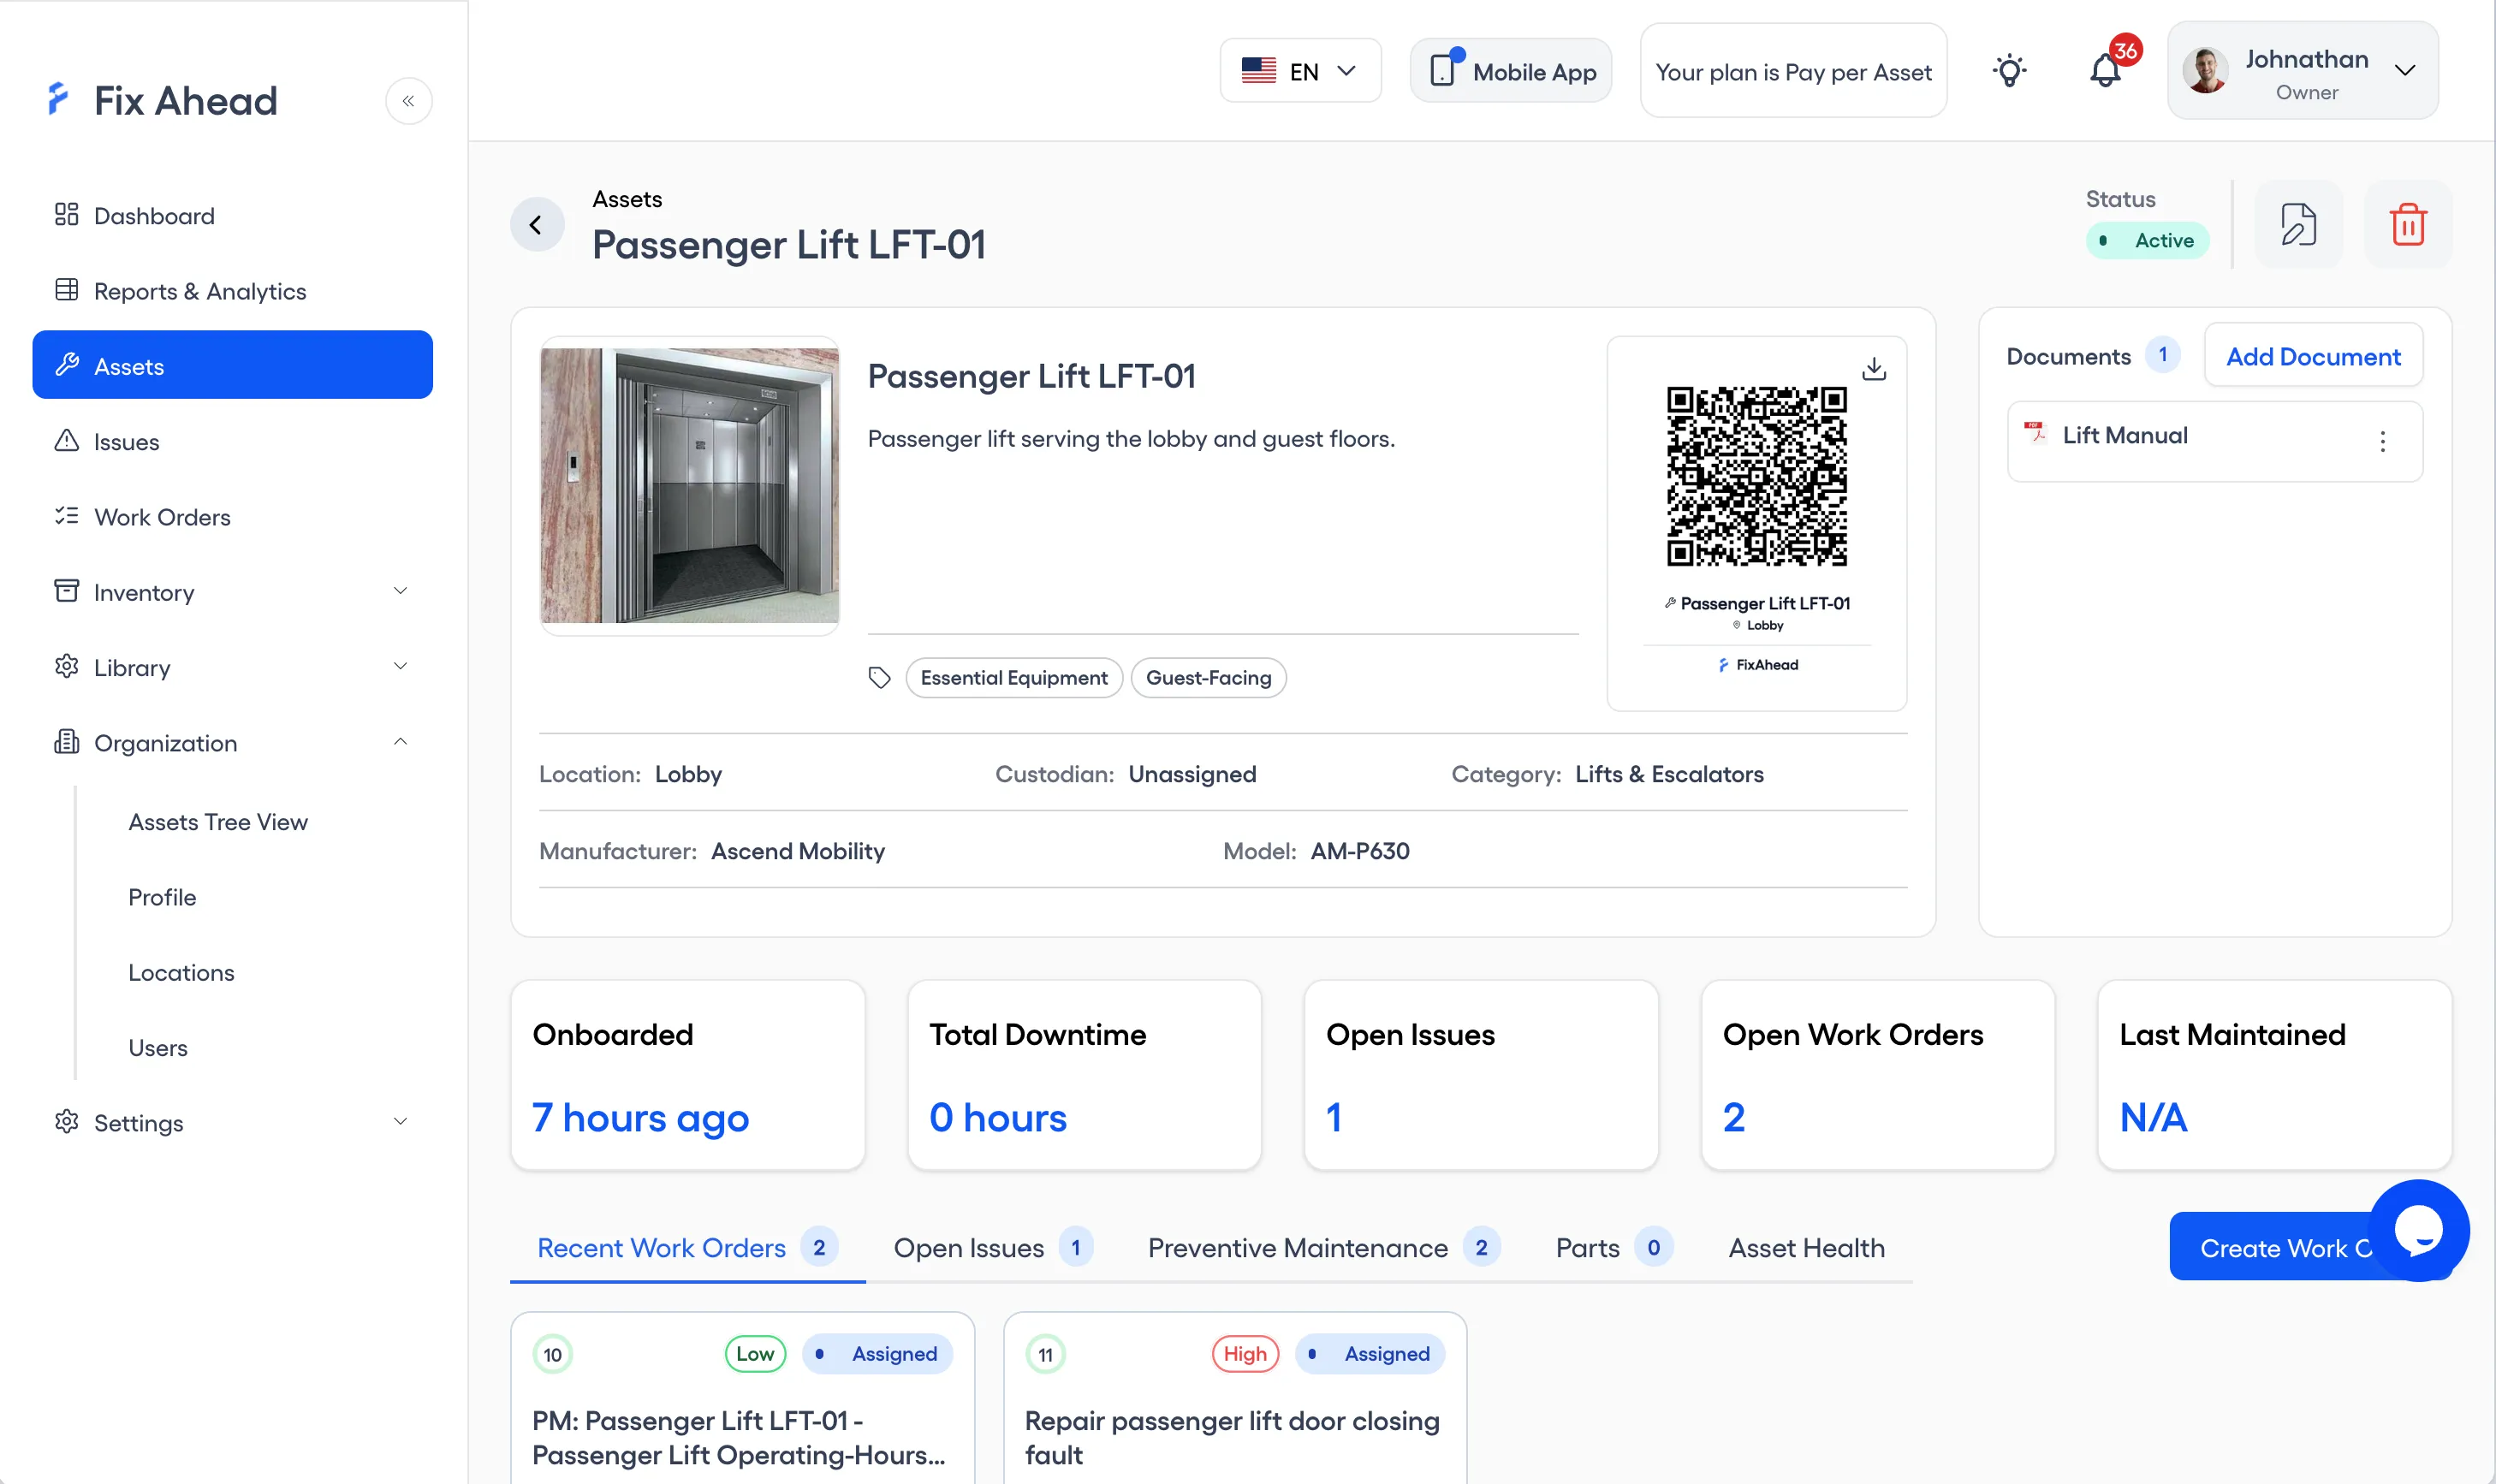
Schedule preventive maintenance
Set up preventive maintenance on any frequency — daily, weekly, monthly, or yearly — and generate work orders in advance so your team has time to prepare. Under Library, Preventive Maintenance lists each schedule with its trigger, frequency, and next due date.
Learn more about Preventive Maintenance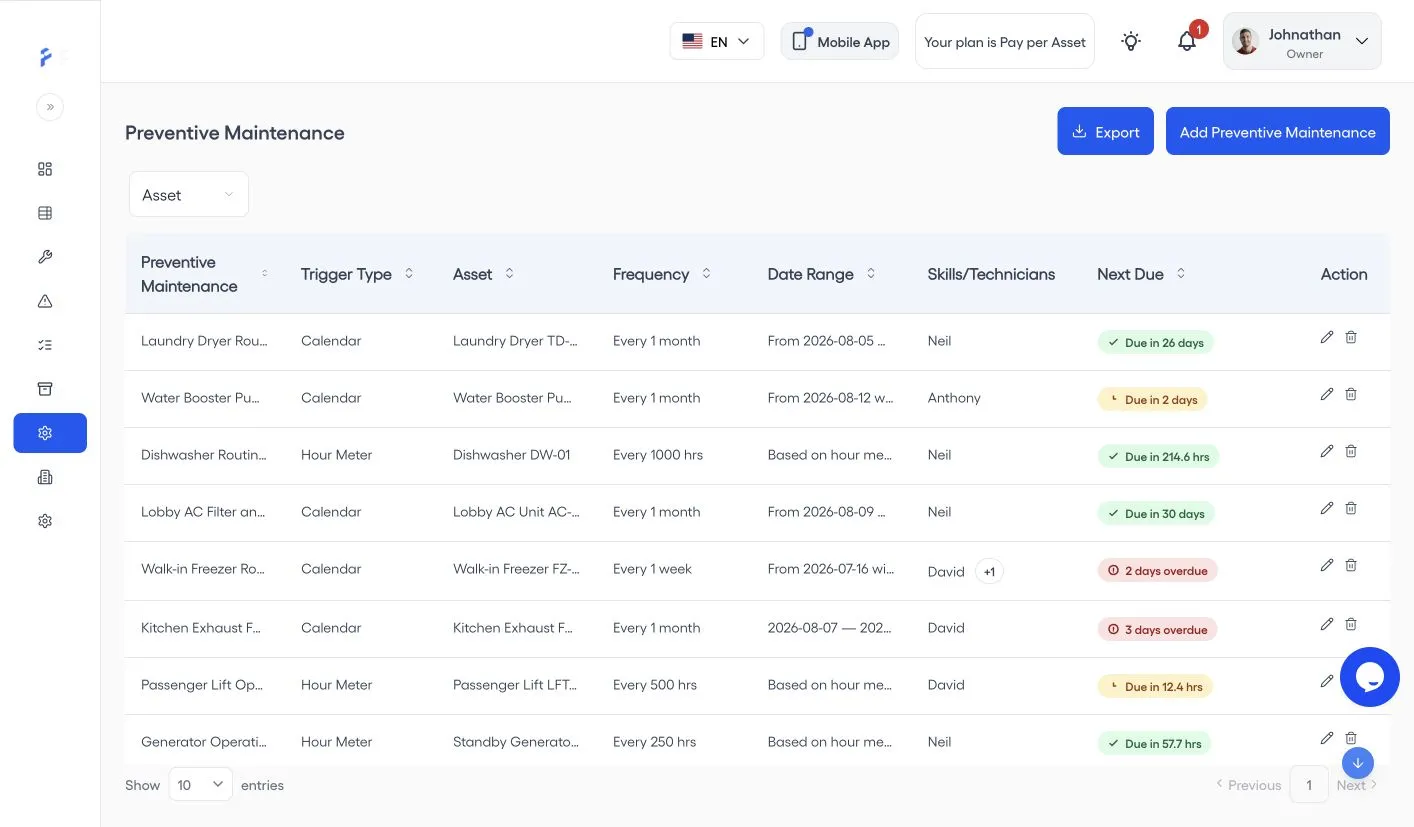
Let anyone report a problem
Anyone scans a QR code to report an issue — no account, no app download — and the report lands with its location and asset.
Learn more about Issue Tracking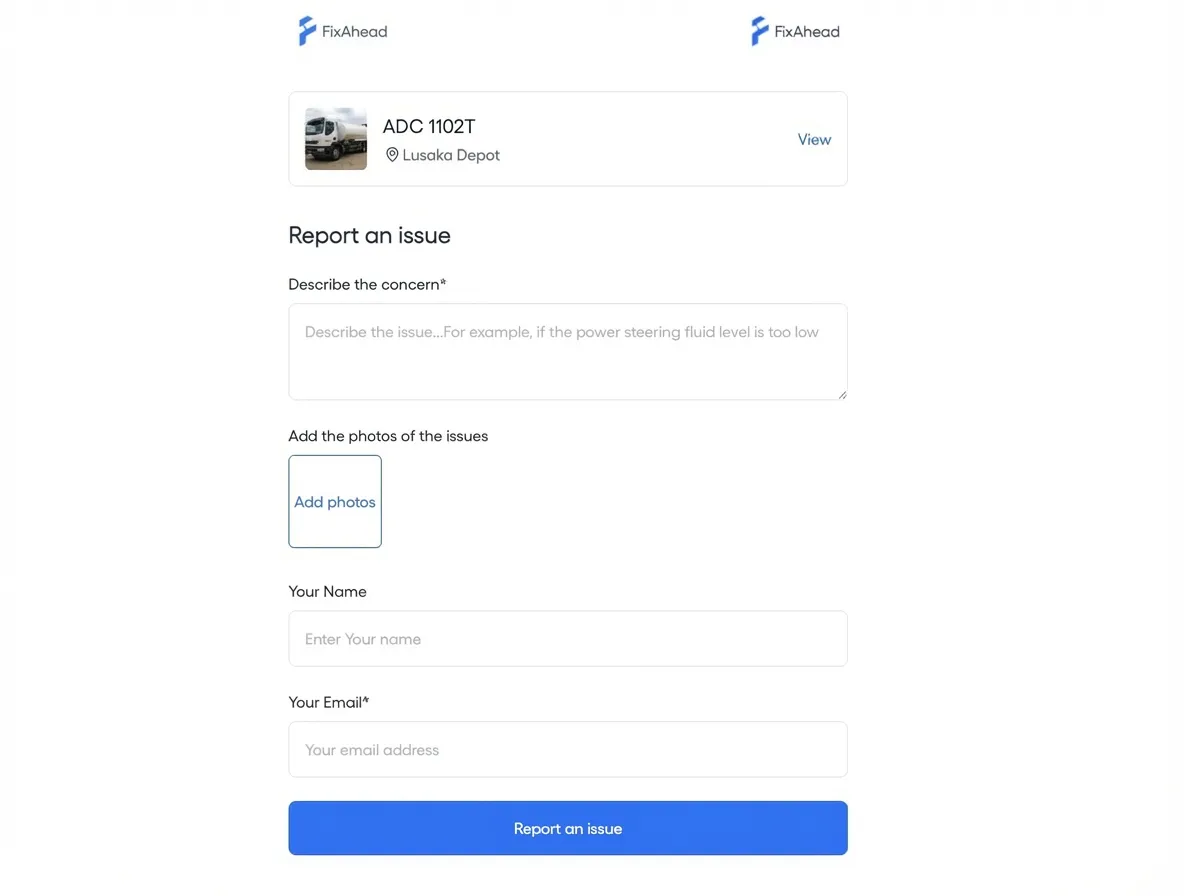
Triage issues on one board
Drag reported issues between columns to triage them, then assign and track resolution from one view. Open the menu on a Reported or Under Review card and choose Create Work Order.
Learn more about Issue Tracking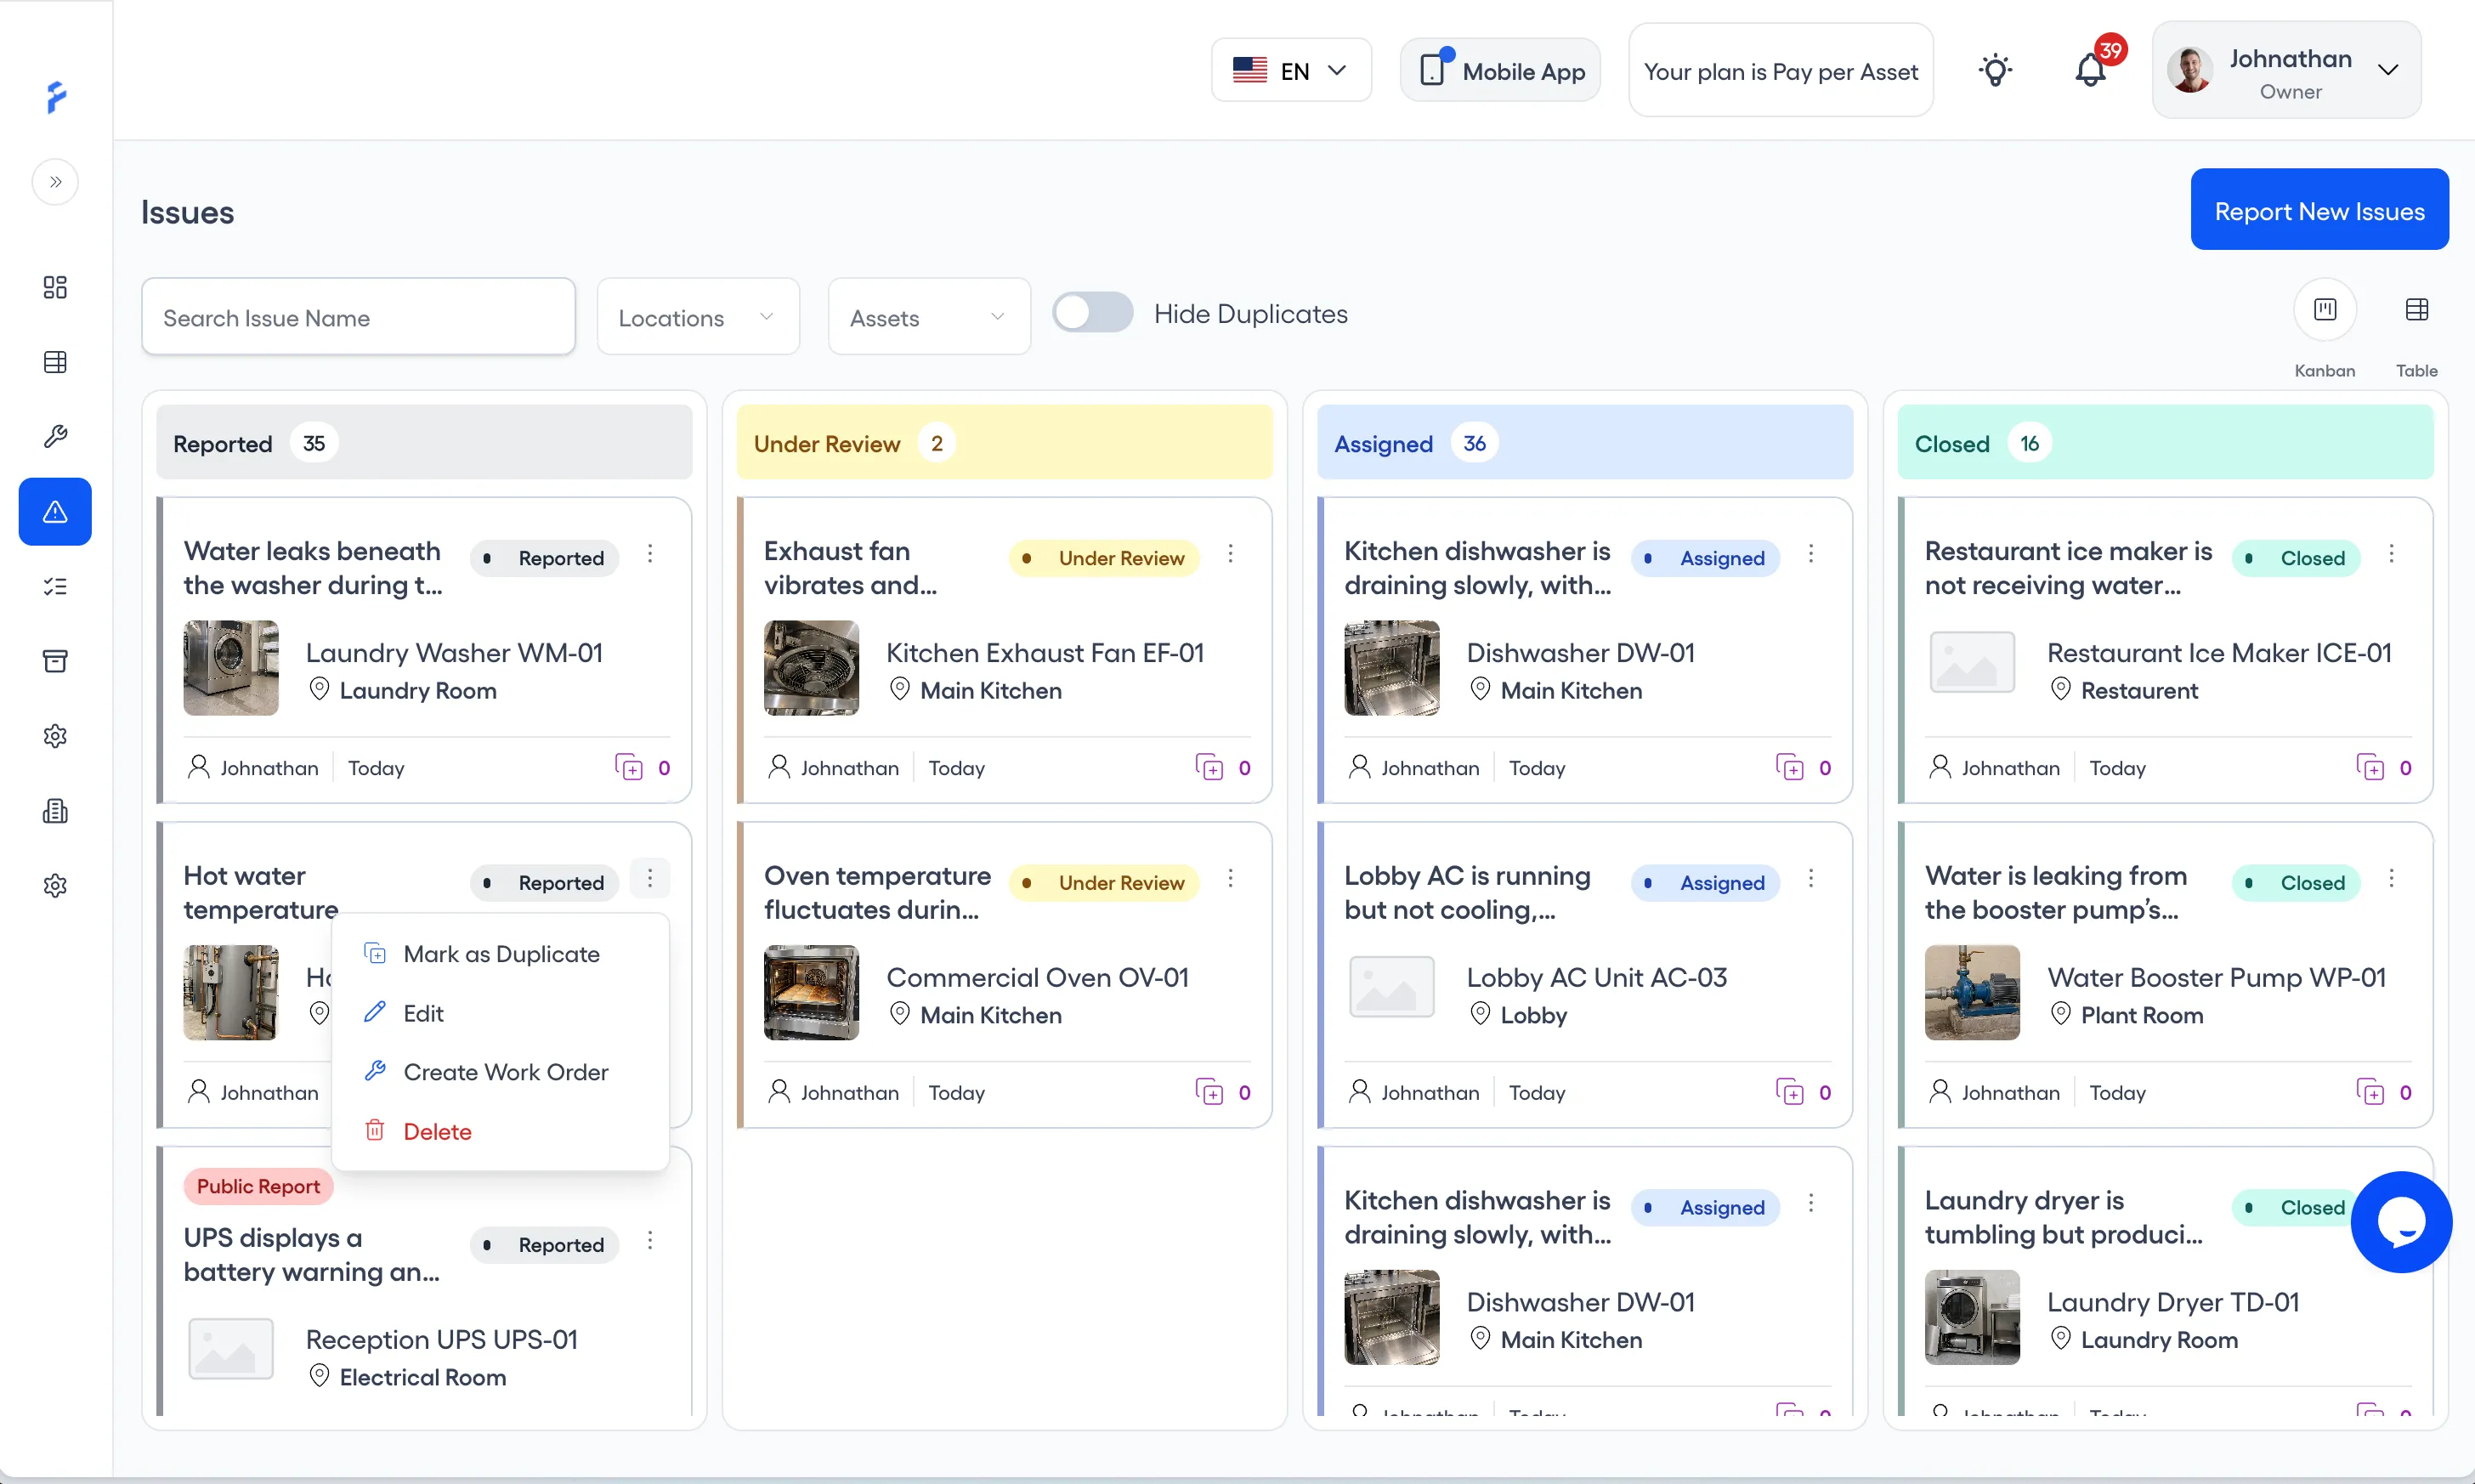
Create the work order
The wizard steps through priority, due date, technician assignment, and procedure (Pro) in one flow. Press Add Work Order to go on to Assignment, where you choose the technicians and the procedure.
Learn more about Work Orders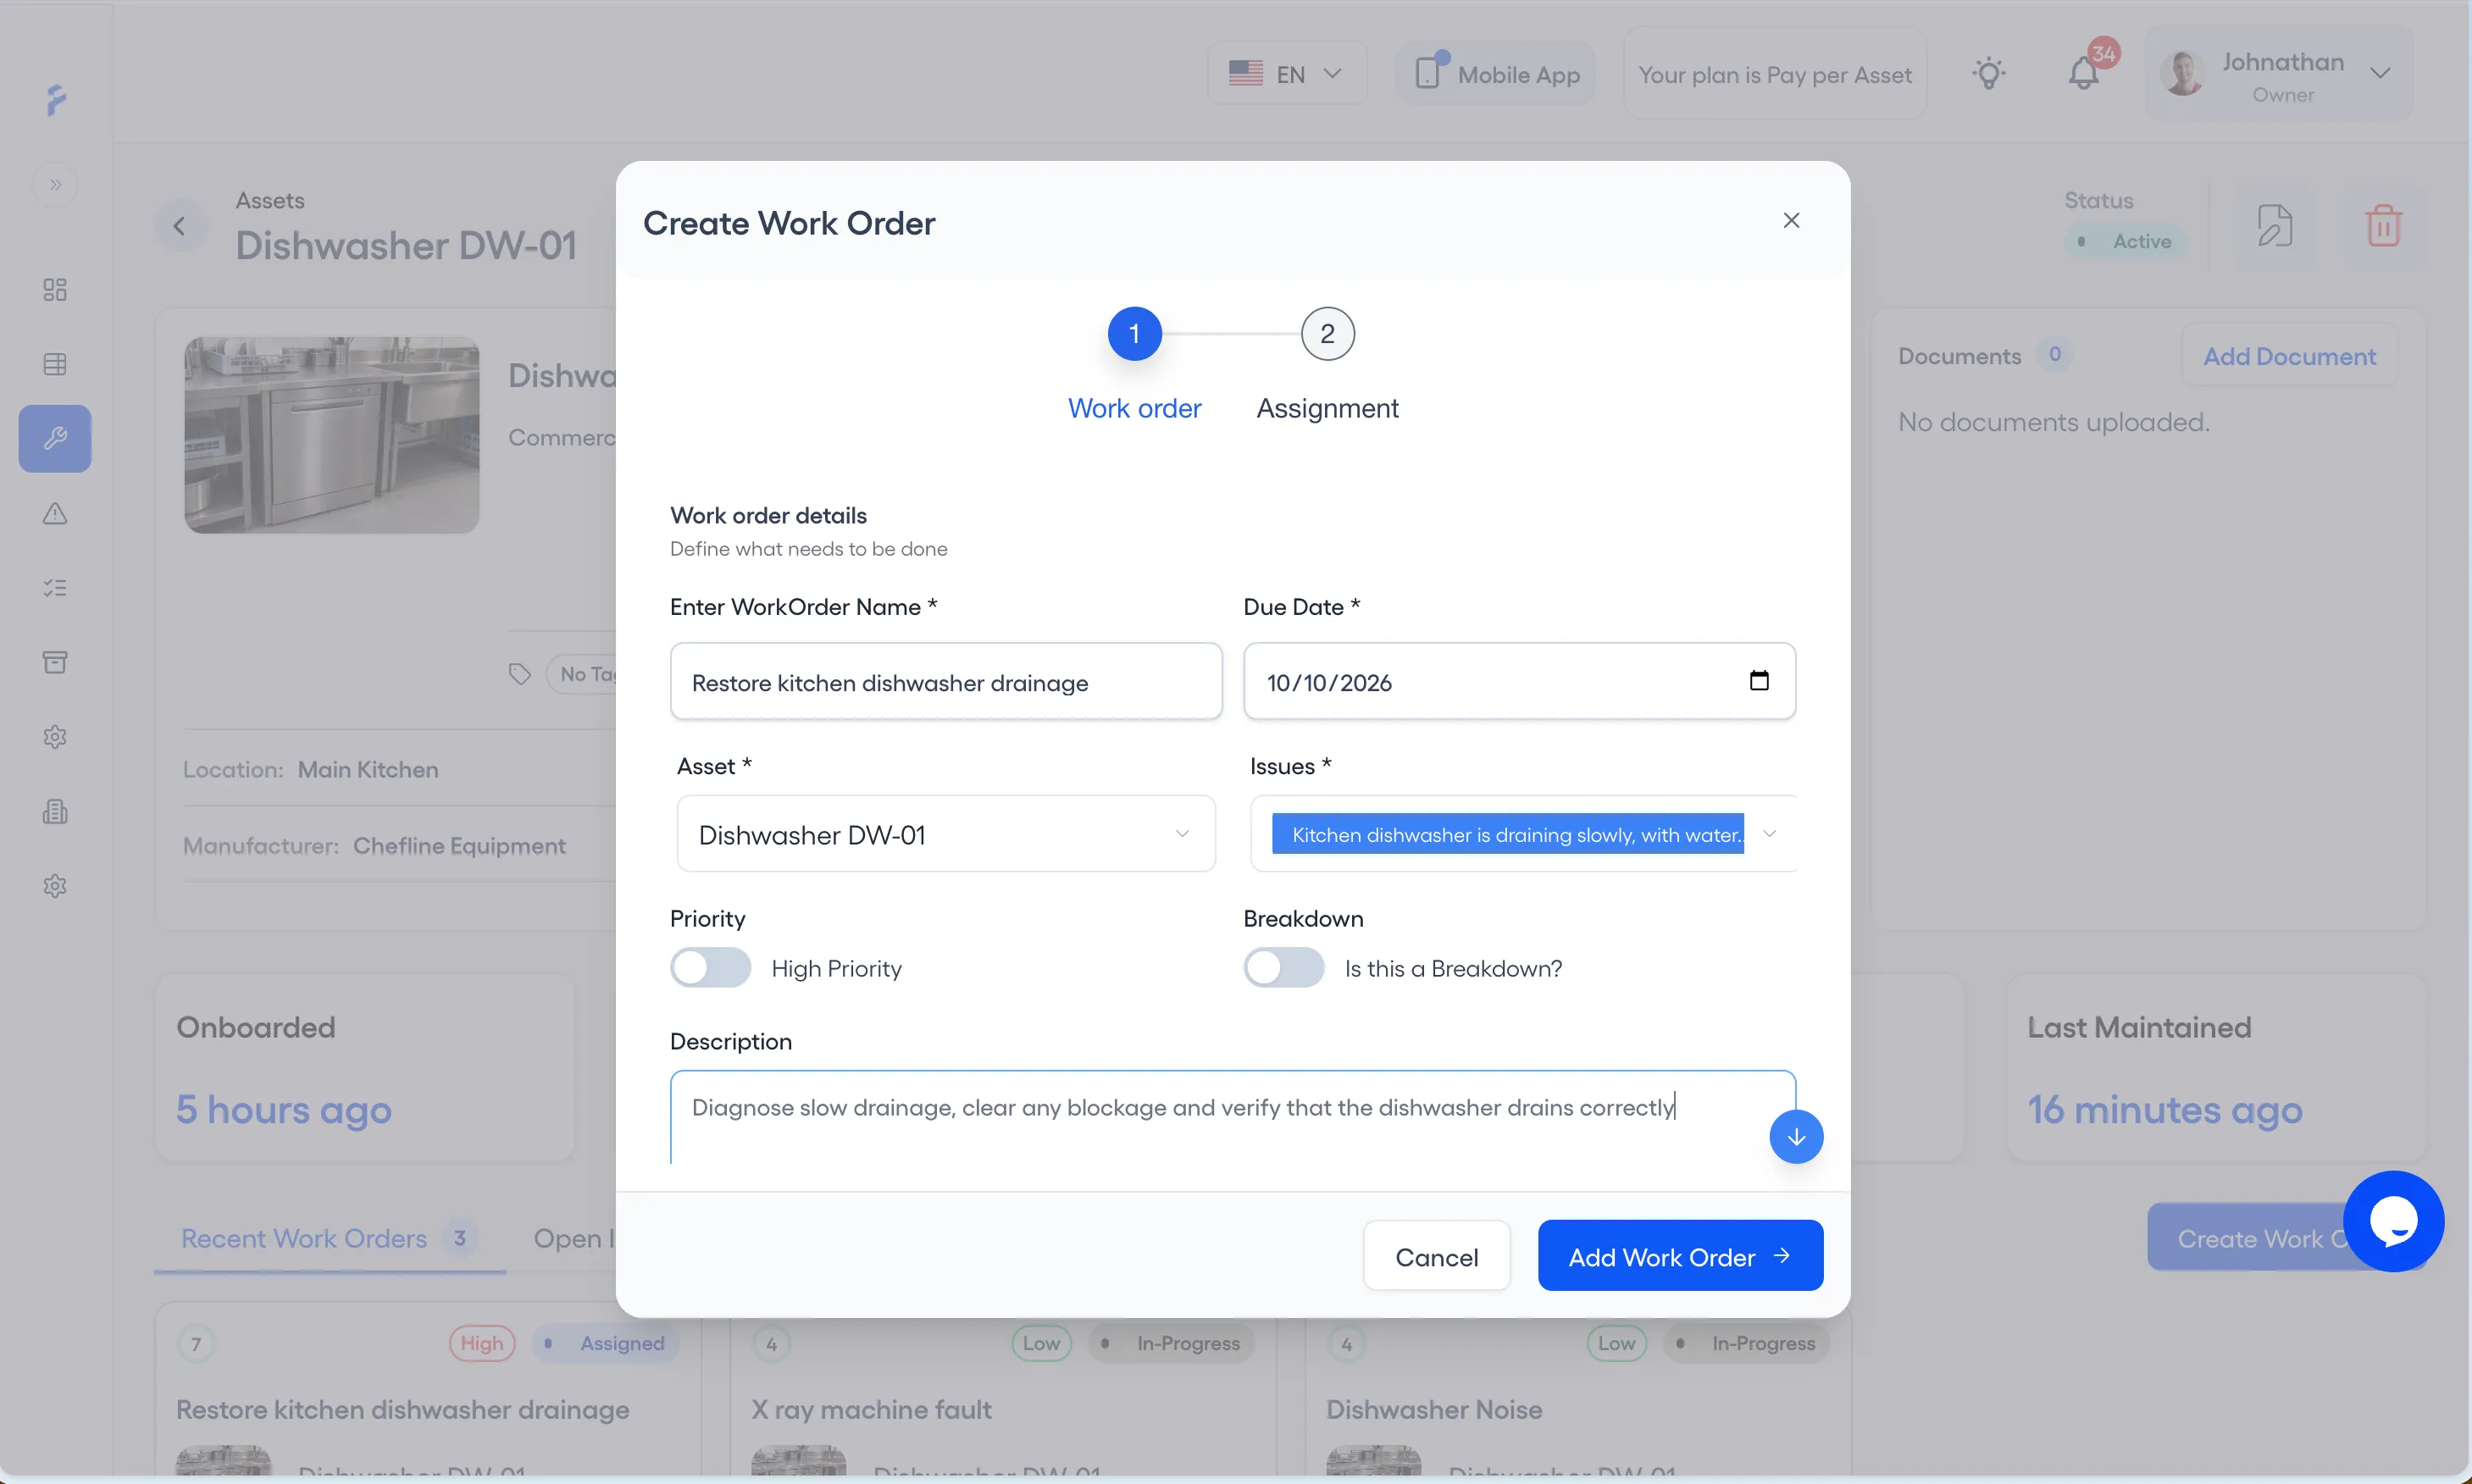
Assign the right technicians
Every work order shows its main technician and any others, so everyone knows who is responsible before they arrive on site.
Learn more about the Mobile App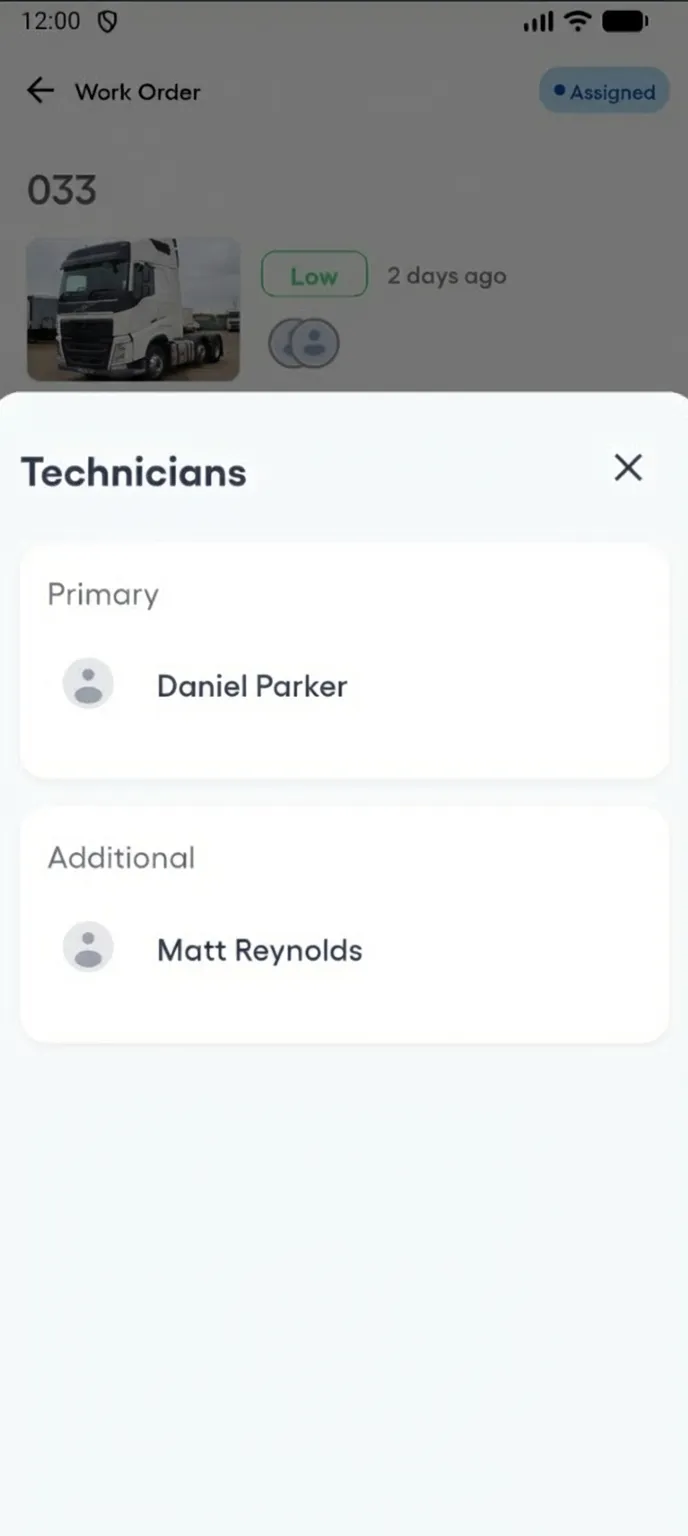
Follow the checklist on site (Pro)
Technicians mark each task complete as they go and attach photo evidence to the step it belongs to. The Android app works offline for assigned work orders, and the work syncs when the connection returns.
Learn more about the Mobile App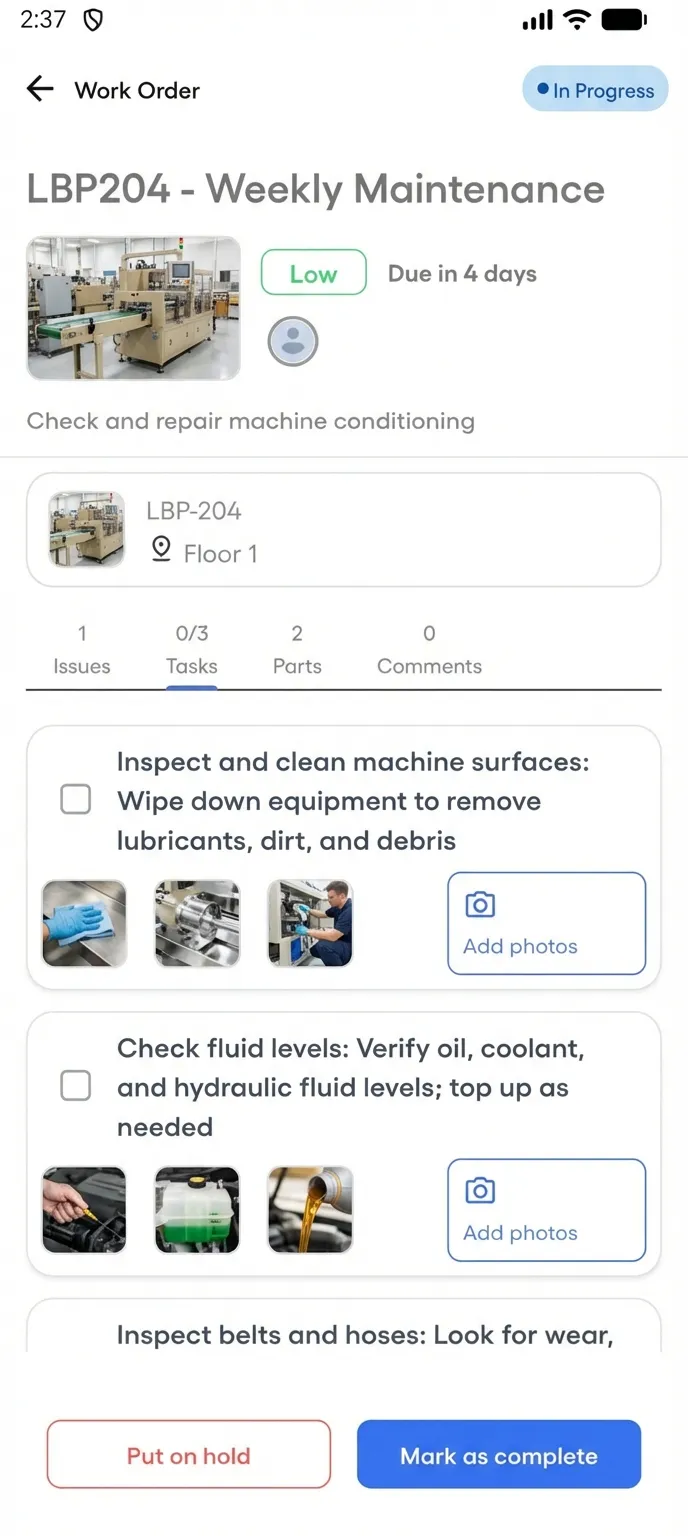
Log the parts used (Pro)
Technicians record the parts used right on the work order, up to the quantity reserved, and stock updates when the job is marked complete.
Learn more about Inventory & Parts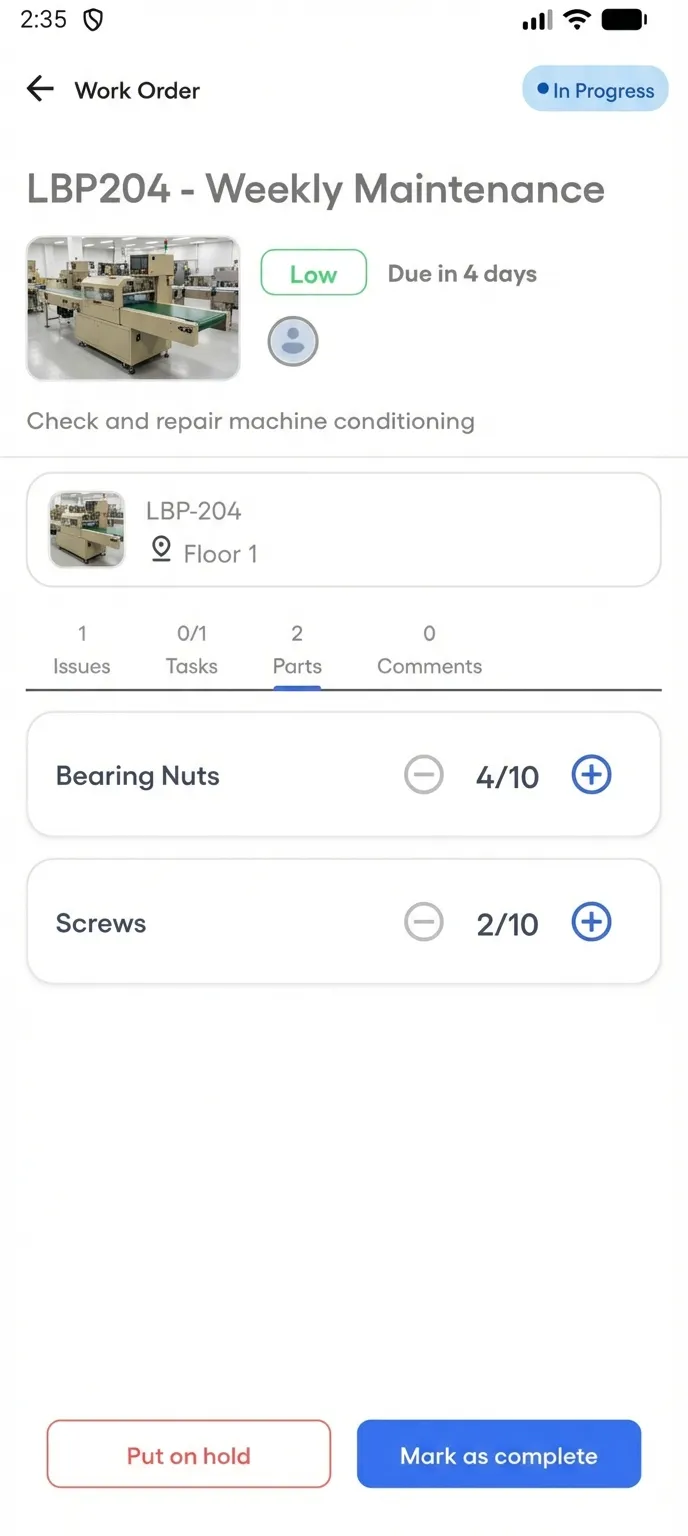
Mark complete with notes and a photo
When the job is done, the technician adds completion notes and at least one photo, then marks the work order complete. The status changes to Completed at once.
Learn more about the Mobile App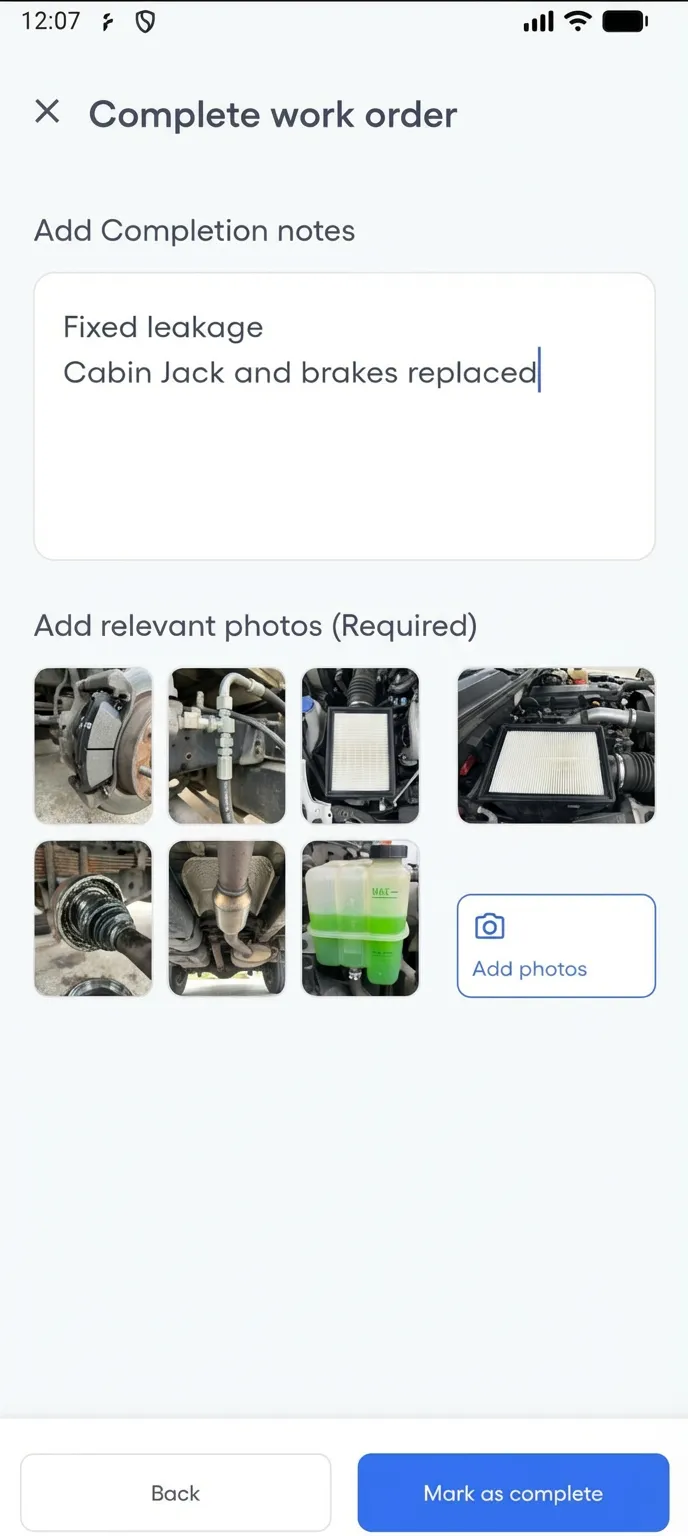
Keep the full record
The timeline captures every status change, from Assigned through Closed.
Learn more about Work Orders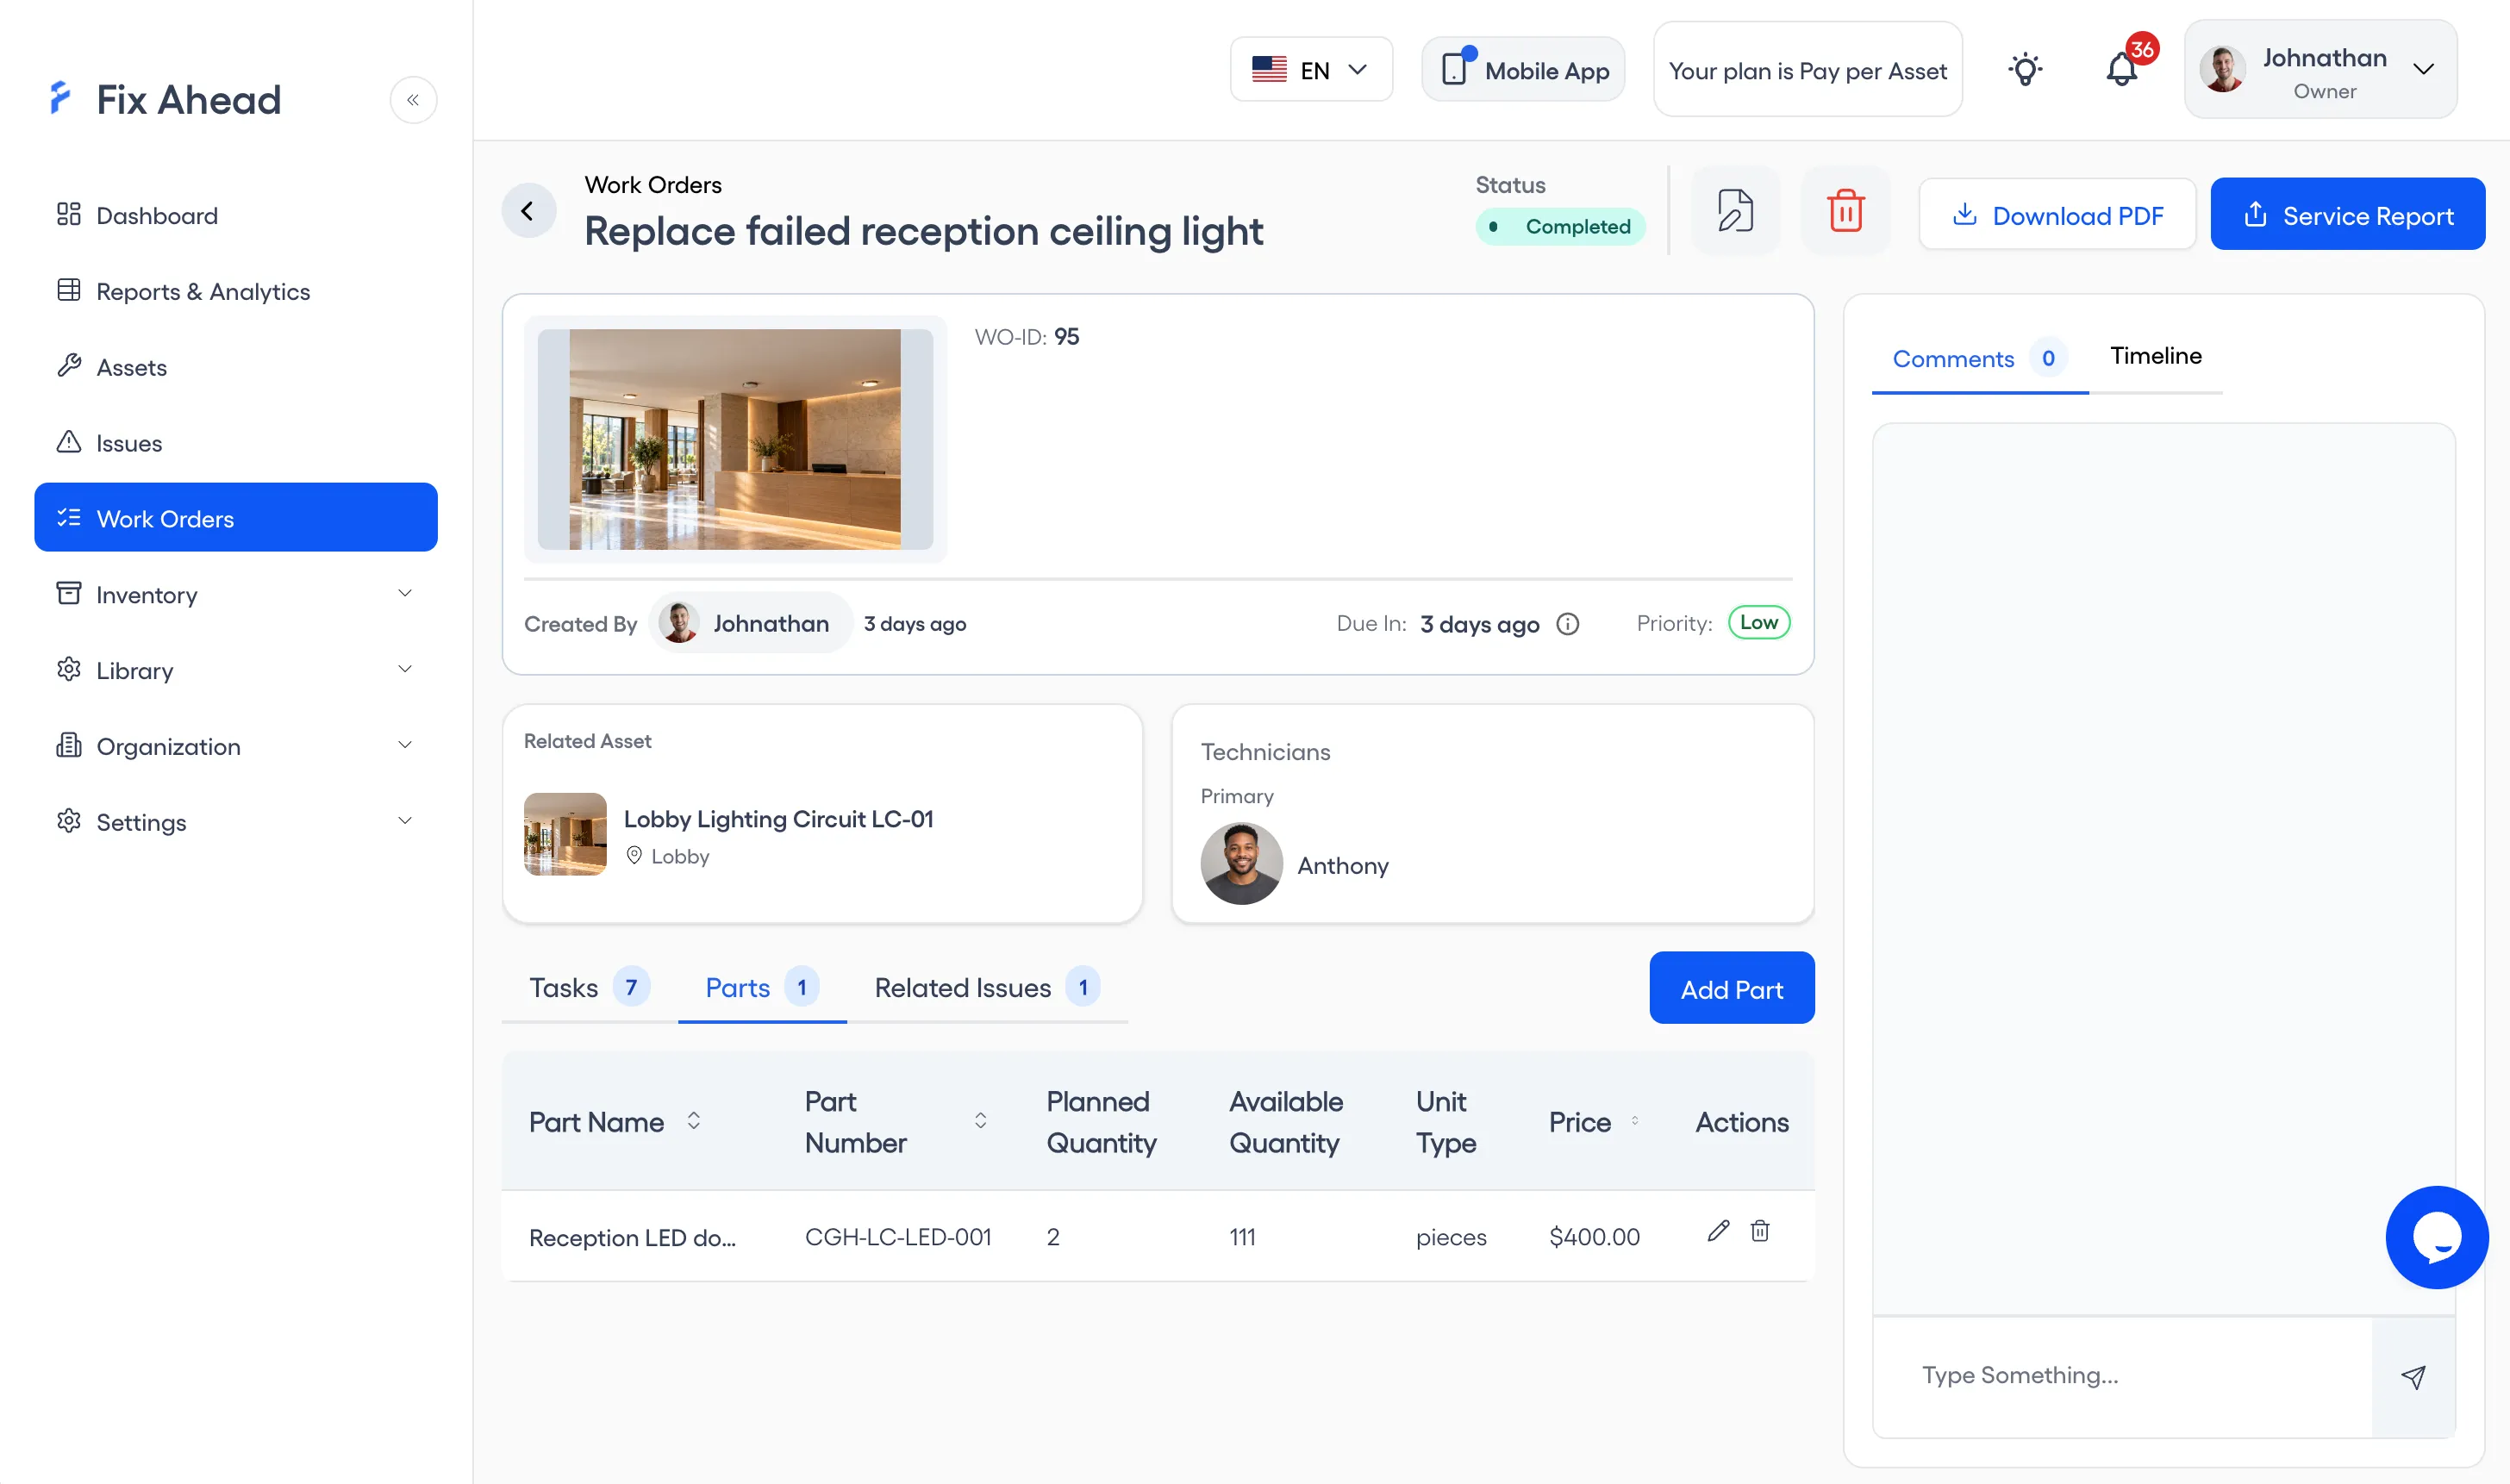
Report on uptime and reliability (Pro)
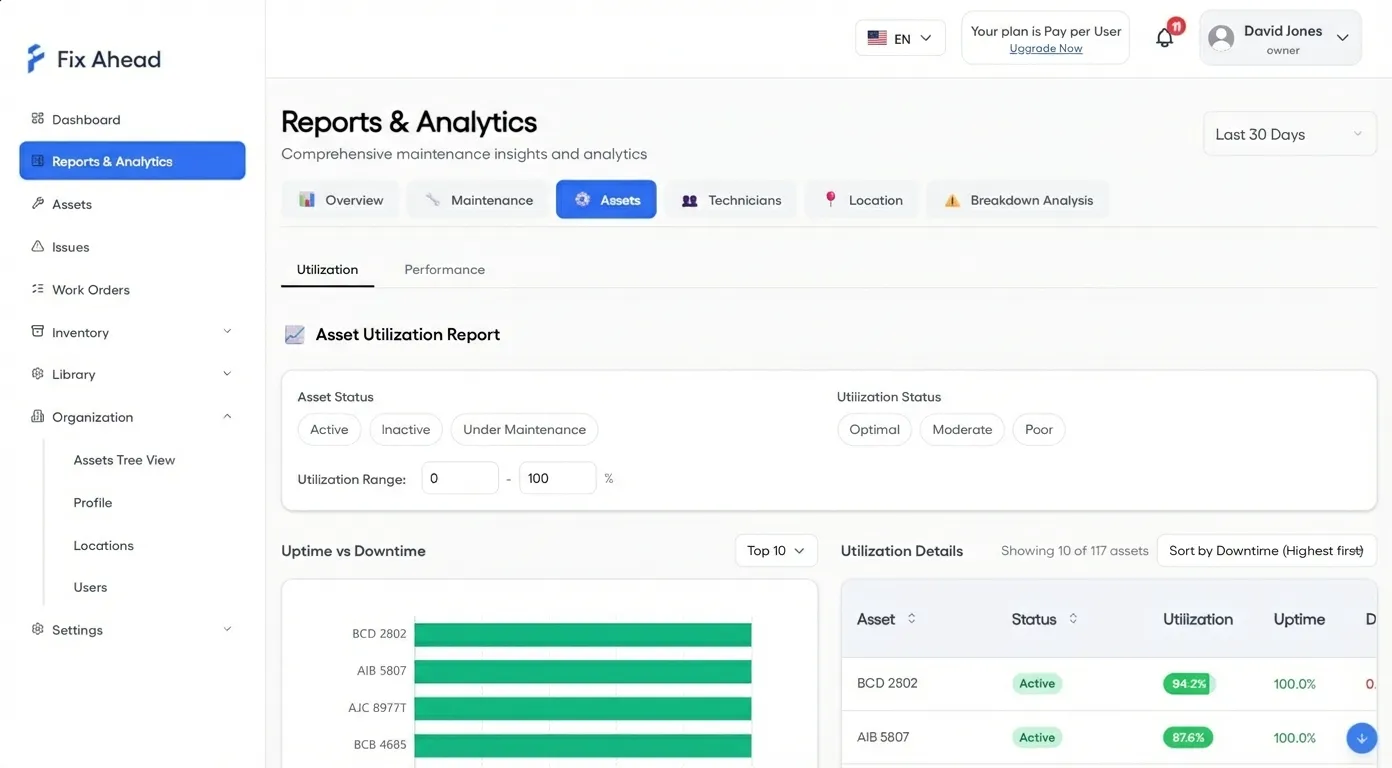
Track uptime against downtime for every asset and measure reliability with MTBF and MTTR.
Learn more about Reporting